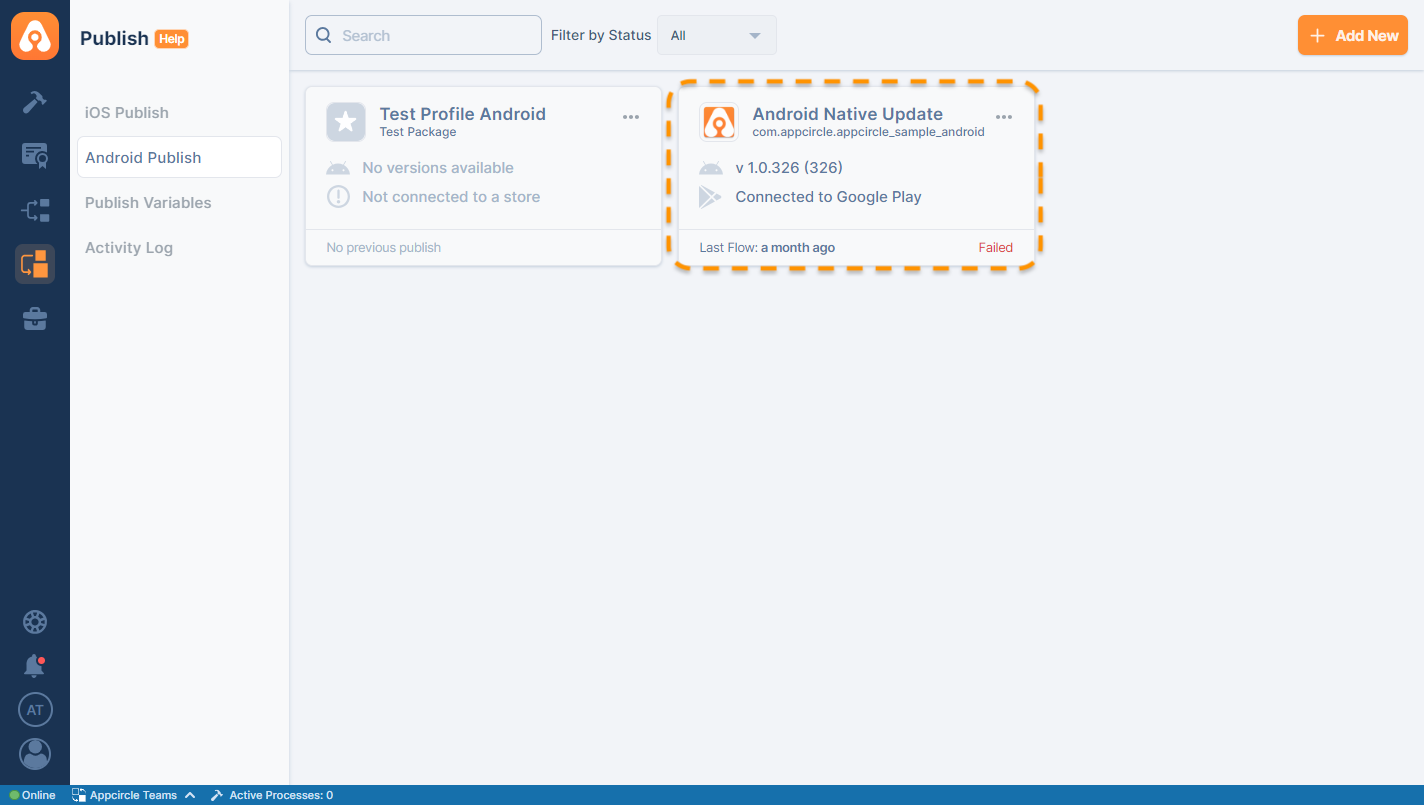
Creating Publish Profiles
After building the application, we can start the publishing process by sending it to the Publish module.
For this, it is necessary to first create a publish profile within the Publish module. Afterwards, the relevant publish profile must be selected from the Distribution tab in the configuration of the relevant profile in the Build module.
In order to create a publish profile, click on the "Add New" button in the Publish module.
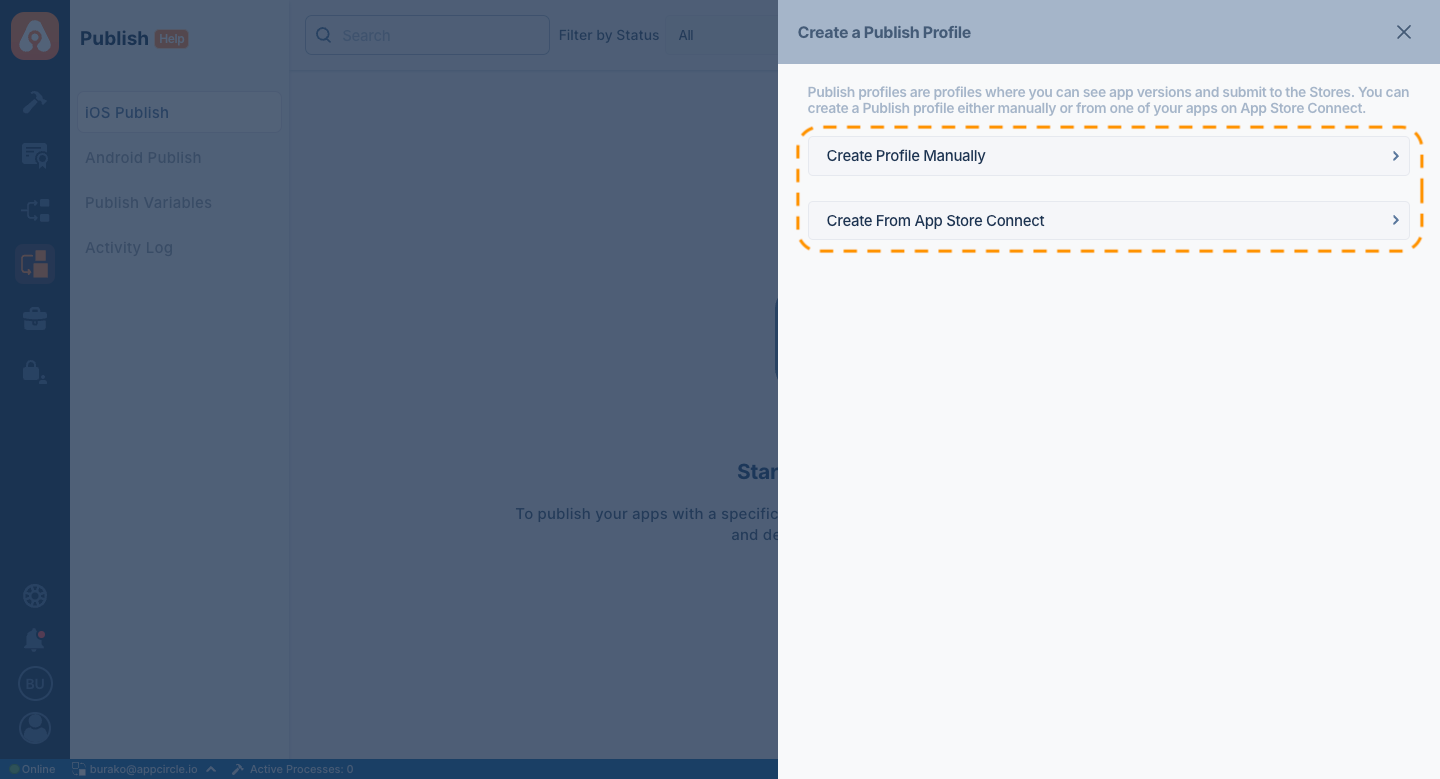
Adding a New Publish Profile
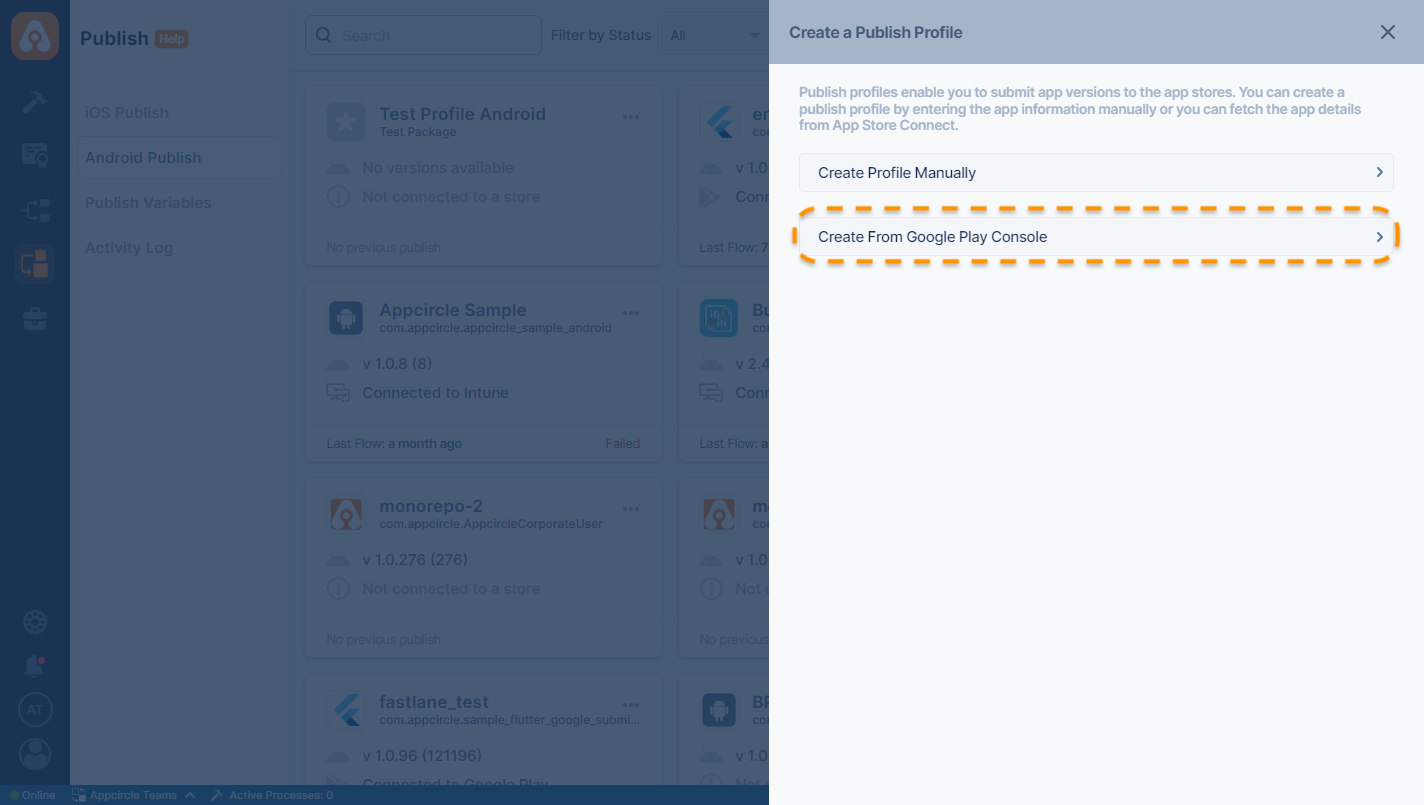
There are 2 different options for creating a Publish Profile. One of them is manual creation and the other is to import your existing Store profile.
The names of the profiles can be changed later and a different name must be set for each profile. This does not apply to Bundle ID and Package Name values. The Bundle ID and Package Name set for a profile cannot be changed again.
iOS Publish Profiles
iOS Publish profiles can be created manually or by importing an existing App Store Connect profile.
Create Profile Manually
Manual creation requires a Publish Profile name and a Bundle ID that must be specified for this profile.
The Bundle ID set during manual creation cannot be changed later and is assigned as the main Bundle ID for that profile.
When manual creation is selected, the name and BundleID fields required for the Publish profile must be filled in.
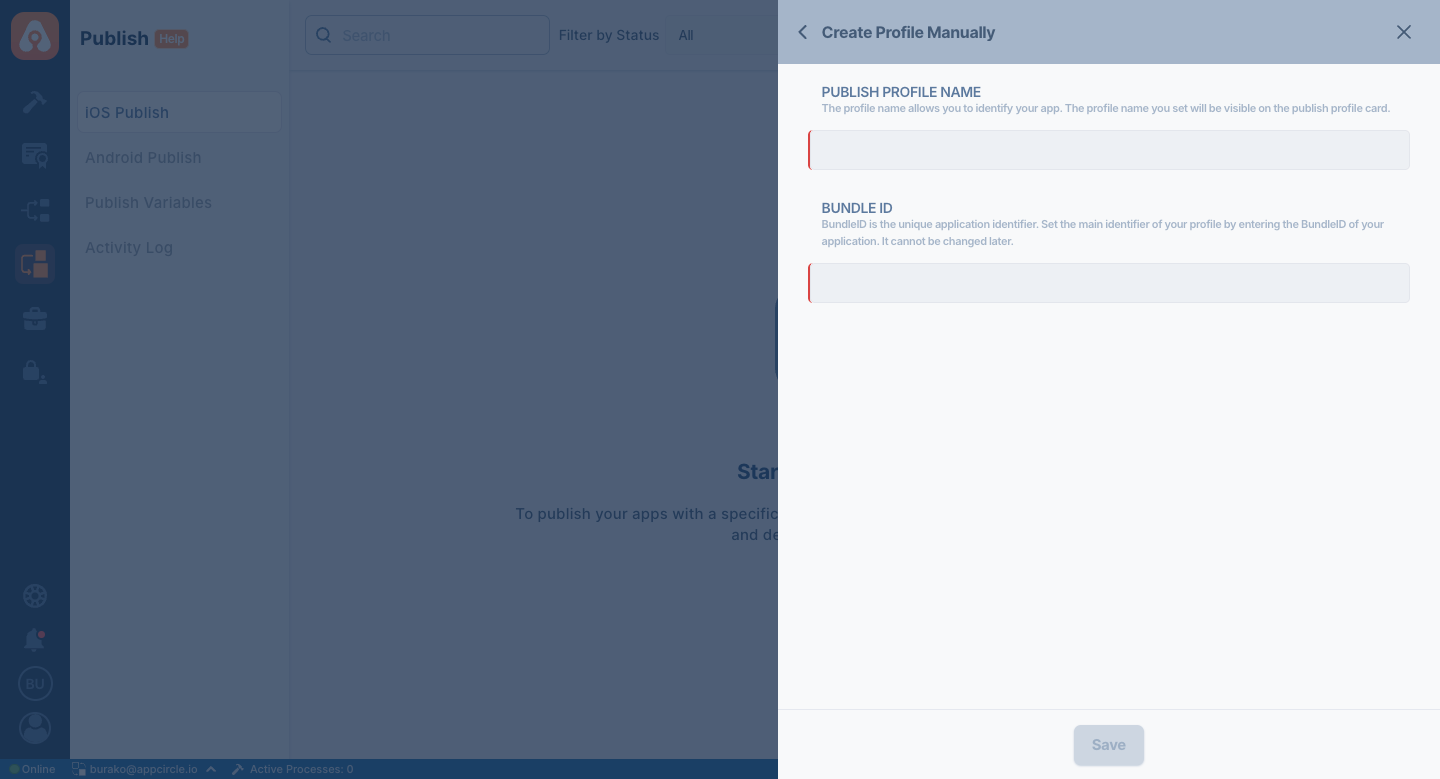
- Publish Profile Name: The name Publish profile is the name given to distinguish your profile from other profiles and appears on the profile card.
- BundleID: BundleID is the unique identifier of your application. It is hard-coded when the profile is created and cannot be changed afterwards.
Please note that once the BundleID value of your profile has been set, it cannot be changed. Therefore, make sure that it is entered correctly.
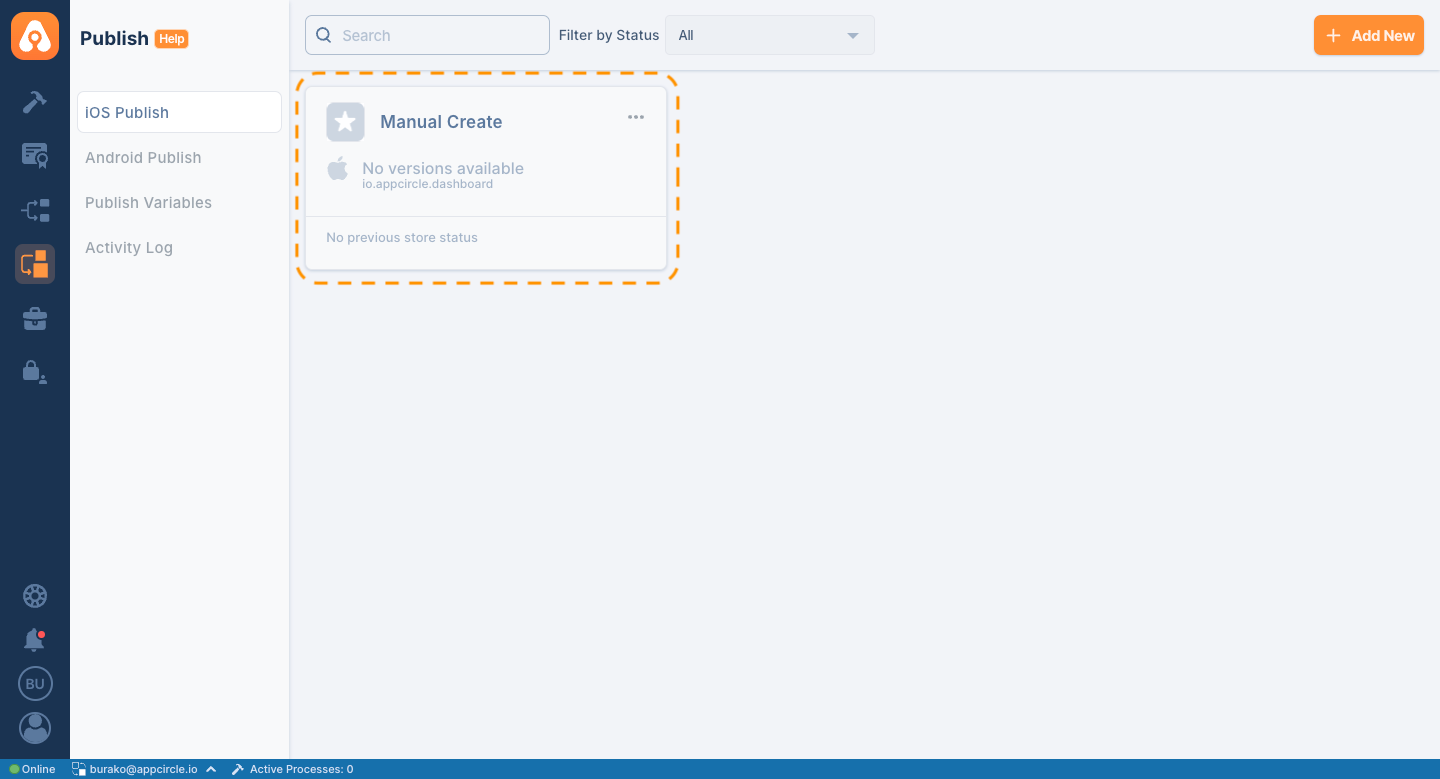
After manually creating your profile, you will see your profile card displayed on the Publish screen.
Once a main Bundle ID is set, this Bundle ID is assigned to the created profile. This means that you can send binaries with different Bundle IDs into this profile, but you can only publish the binary that matches the profile Bundle ID.
An exclamation mark appears next to the binary that does not match the main Bundle ID of the profile. This means that the current Bundle ID of the binary does not match the specified Bundle ID.

Create from App Store Connect
Another option to create a profile is to import it. With this feature, a Publish profile is created with your existing app profile information on App Store Connect.
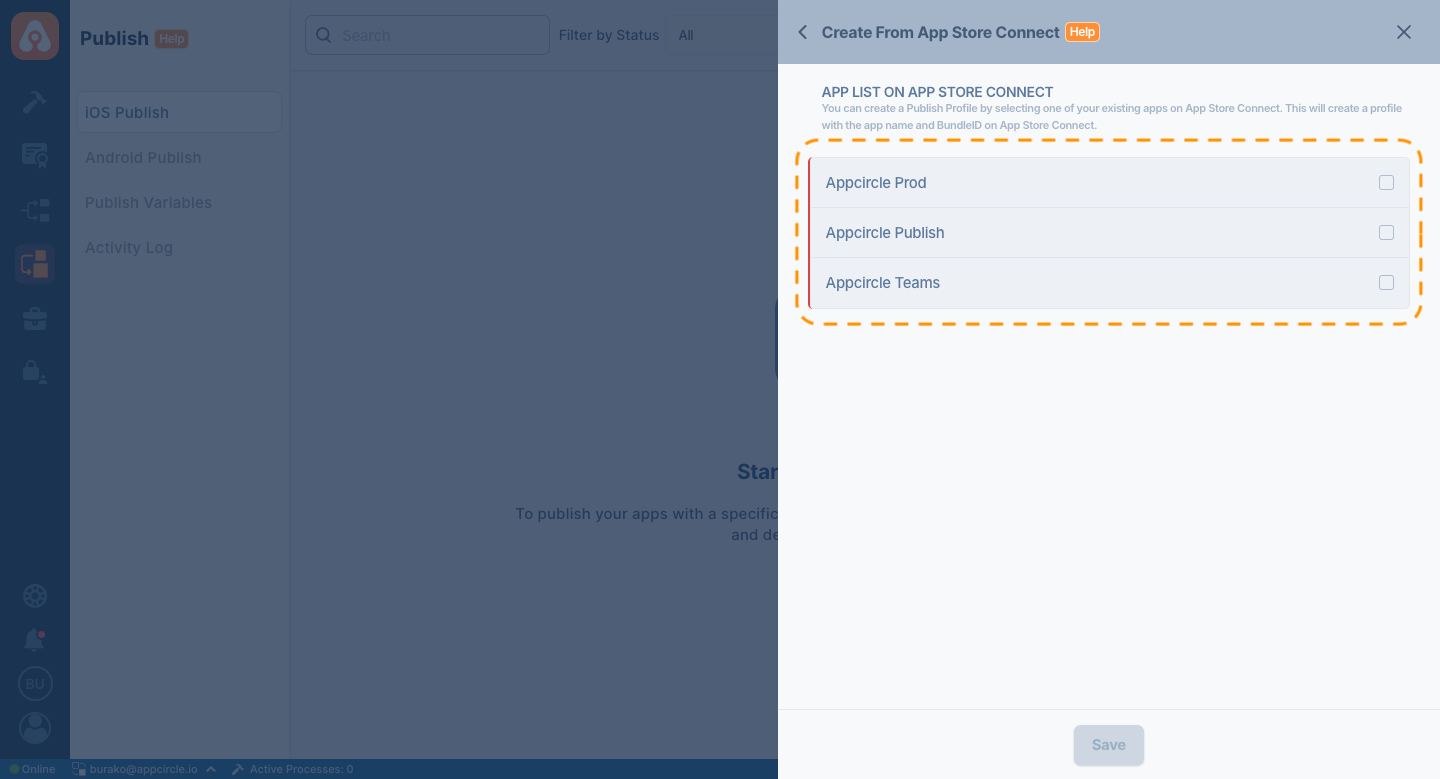
Profiles on App Store Connect are listed with API key connection. In this list, the profile is imported by selecting either multiple or single profiles.
The Bundle ID value of the profile imported via App Store Connect is assigned the same value as the profile you imported. It cannot be changed afterwards.

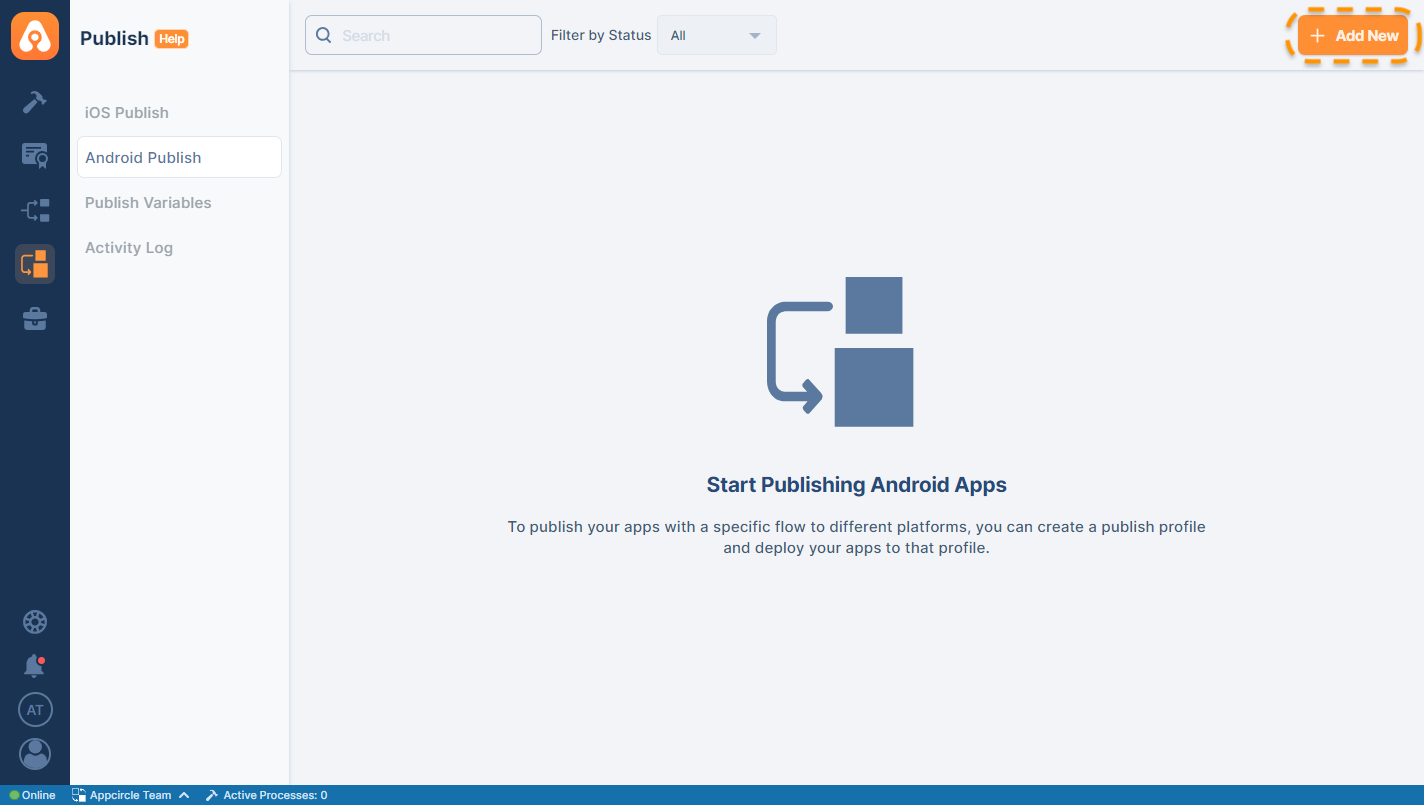
Android Publish Profiles
Android Publish profiles can be created manually or by importing an existing Google Play Console profile.
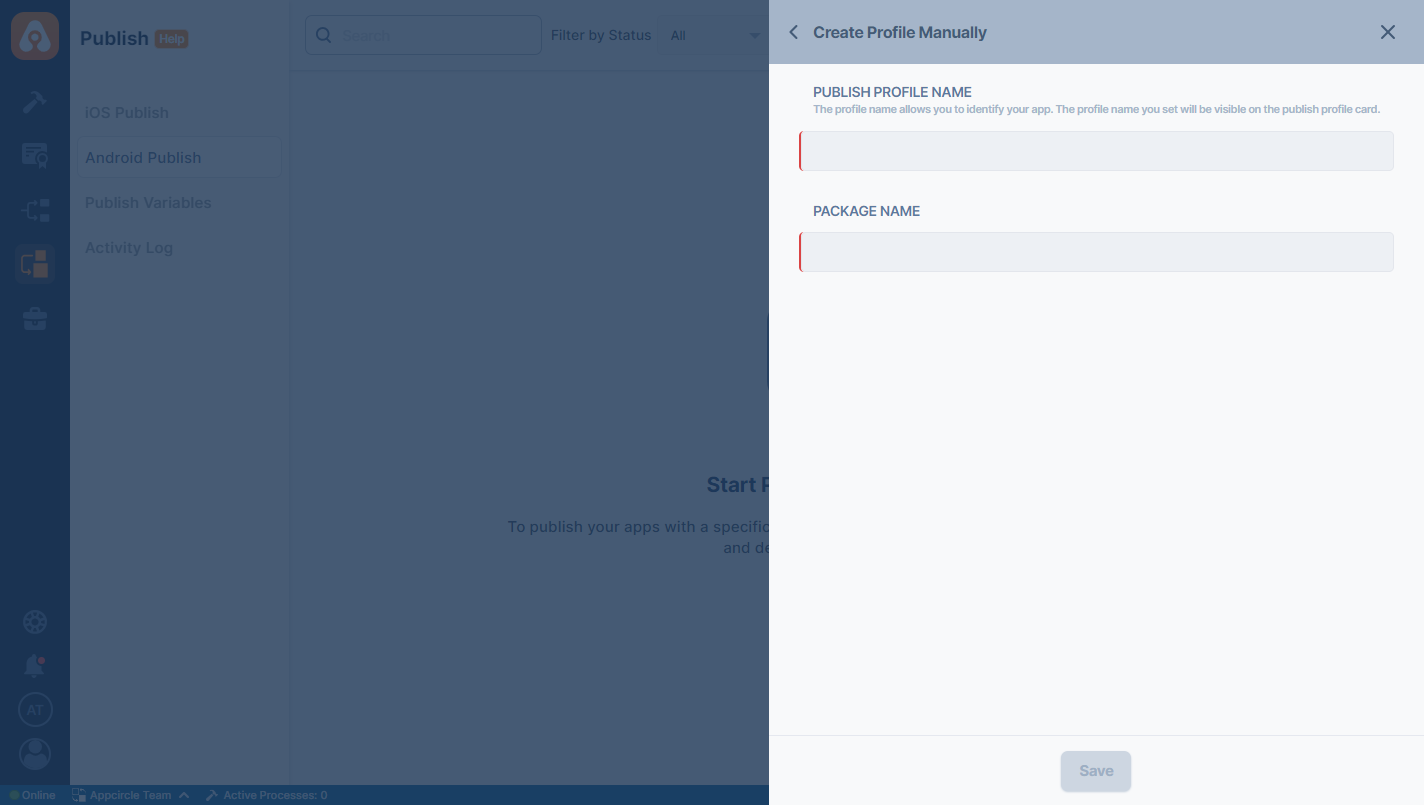
Create Profile Manually
Manual creation requires a Publish Profile Name and a Package Name that must be specified for this profile.
The Package Name set during manual creation cannot be changed later and is assigned as the main Package Name for that profile.

When manual creation is selected, the name and Package Name fields required for the Publish profile must be filled in.
- Publish Profile Name: The name Publish profile is the name given to distinguish your profile from other profiles and appears on the profile card.
- Package Name: Package Name is the unique identifier of your application. It is hard-coded when the profile is created and cannot be changed afterwards.
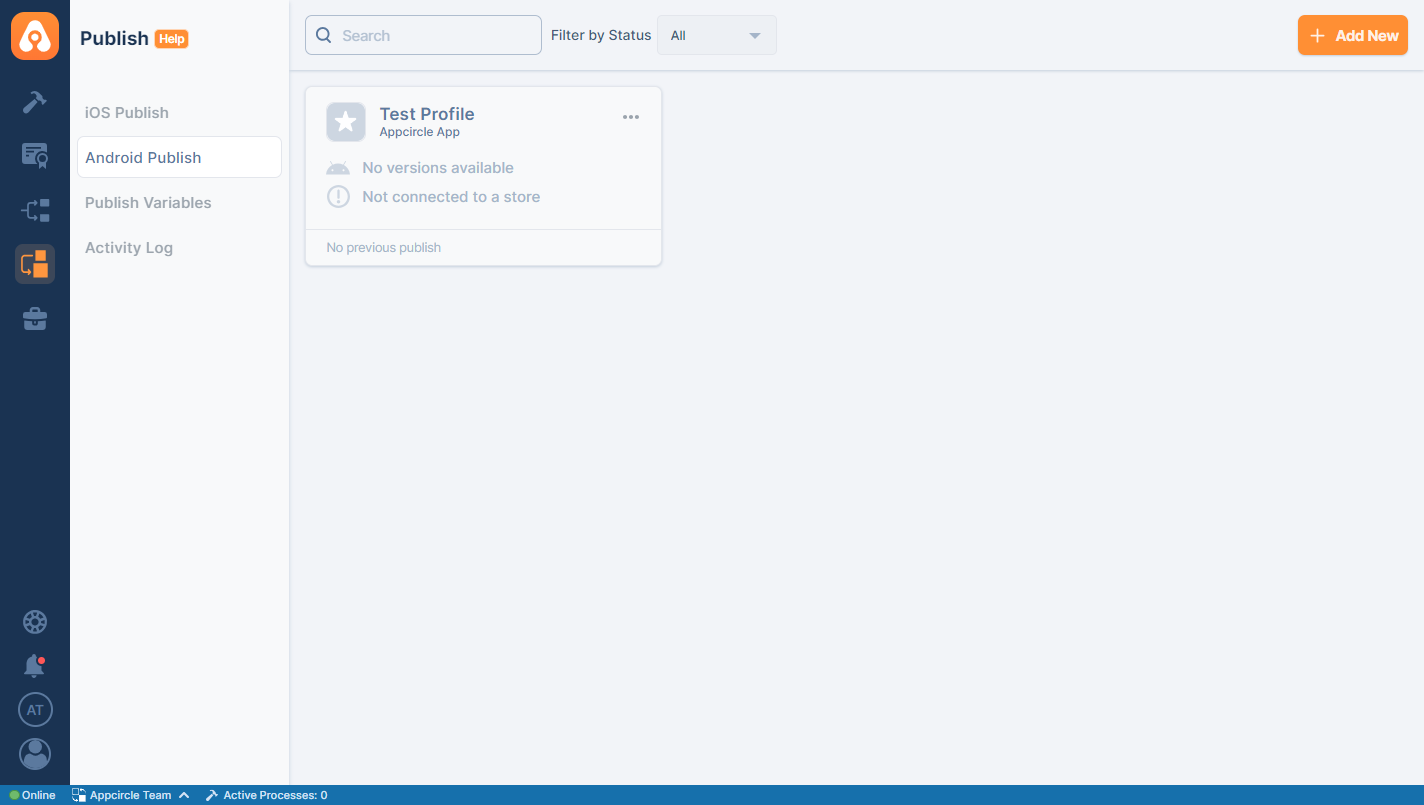
After manually creating your profile, you will see your profile card displayed on the Publish screen.
Create from Google Play Console
Another option to create a profile is to import it. With this feature, a Publish profile is created with your existing app profile information on Google Play Console.
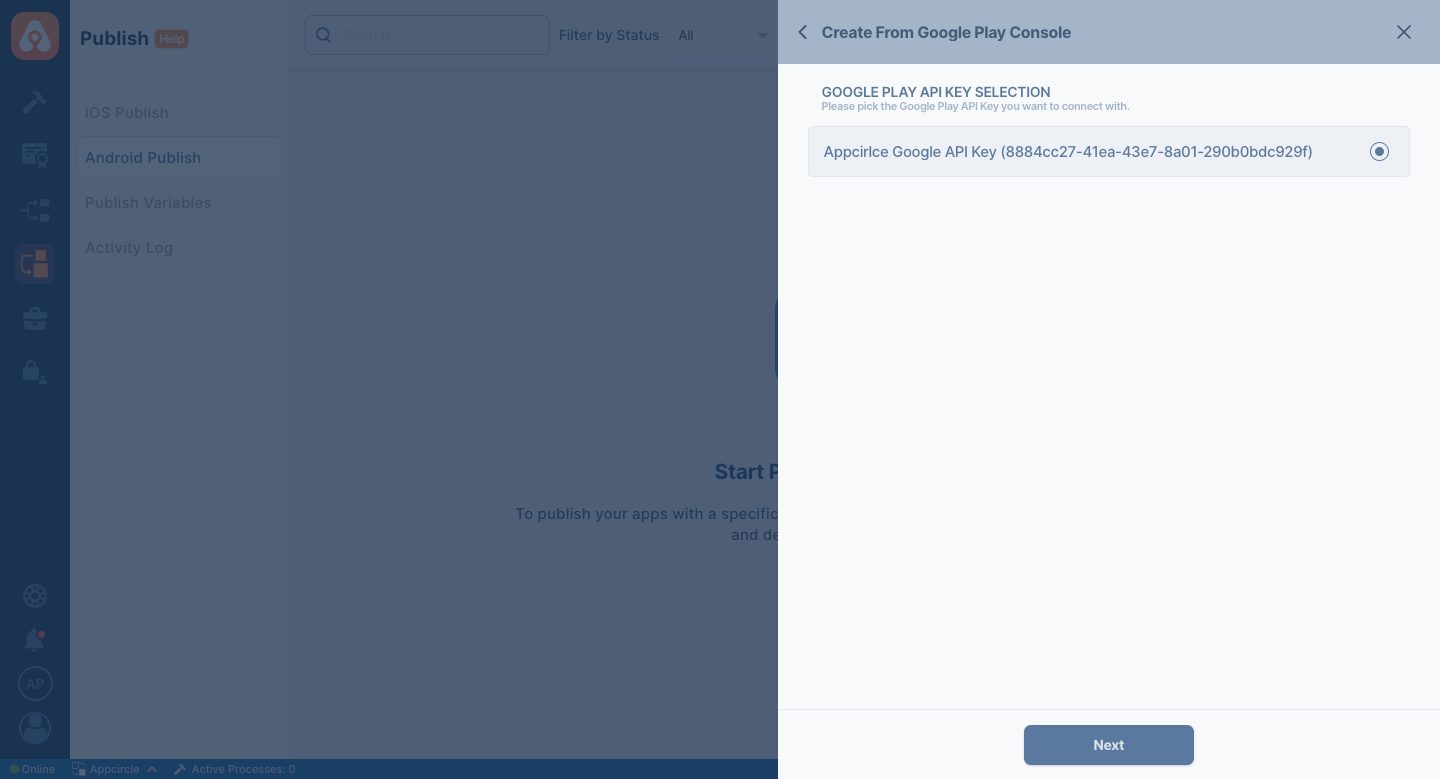
First, a Google Play Console API key must be selected. This will be used to retrieve certain information from Google Play Console during the profile creation process.
Next, a Package Name must be provided. Appcircle will use the selected API key and the given Package Name to search for a match in Google Play Console.
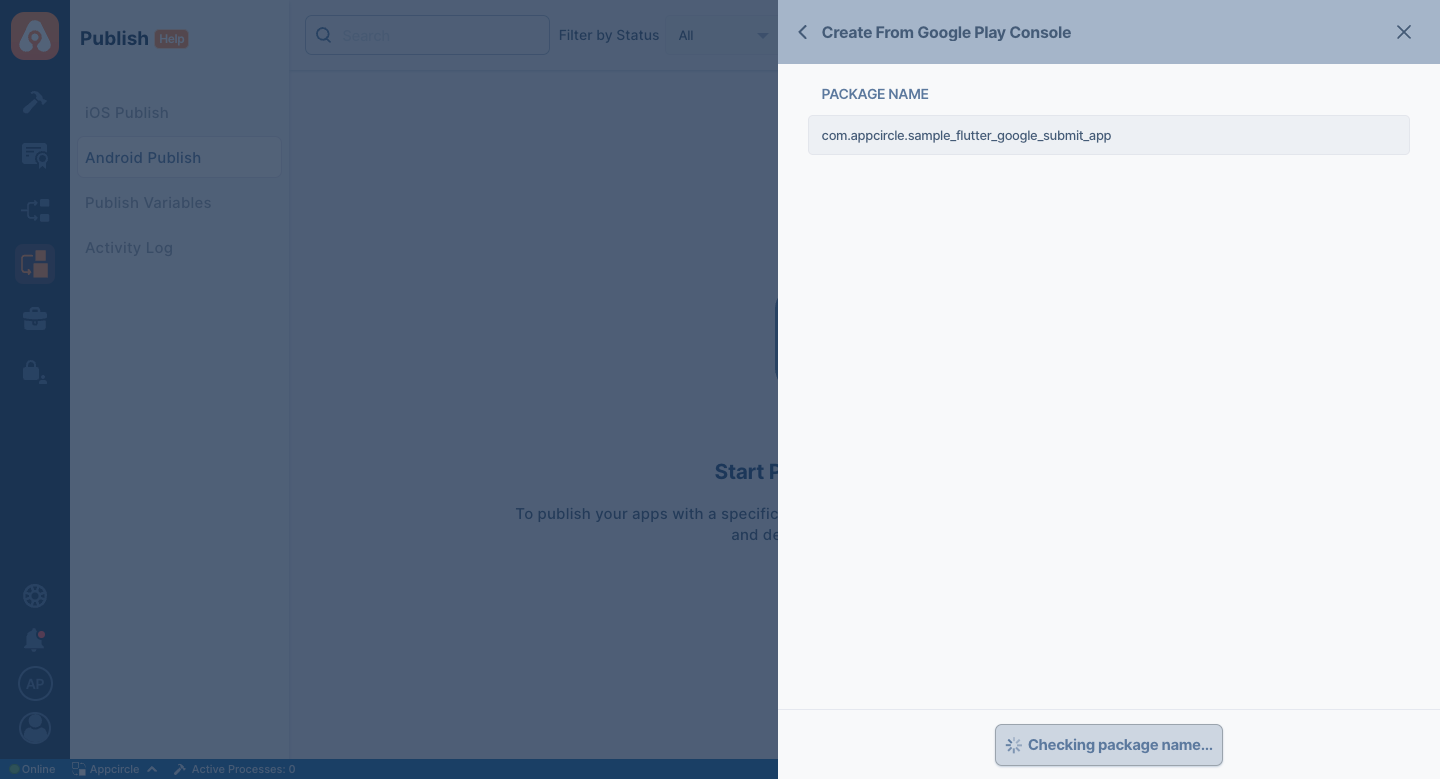
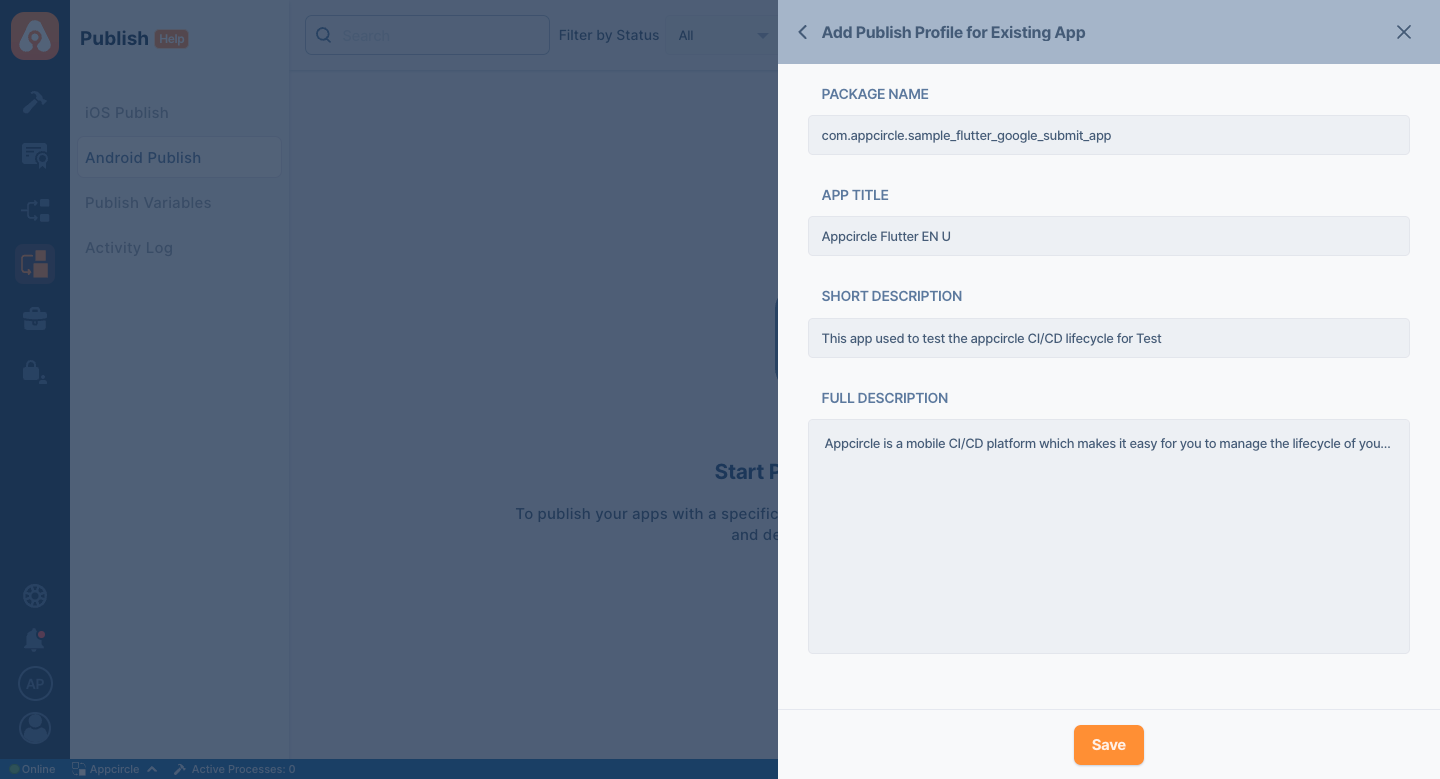
If a correct match is found, the profile details will be displayed on the screen.
The Package Name value of the profile imported via Google Play Connect is assigned the same value as the profile you imported. It cannot be changed afterwards.